Showing posts with label PaperArtsy. Show all posts

25 January 2020

PaperArtsy Blog - Topic 2: A Hint of Spring - Spring Zing


Hi everyone, hope you've having a good weekend so far. I'm contributing on the PaperArtsy blog tonight for their hint of spring topic sharing my mini album using the JOFY stamps and stencils shown below.


I started off by making a masterboard, covering A4 card with Infusions in LemoncelloBlackcurrant and Terracotta andspritzing with water.

I used a lot of colours of Fresco Finish Chalk Acrylic Paints in a mix of opaques, semi opaques and translucents, the zing you get from the translucents brightens everything up.


There are more process photo's on the PaperArtsy blog to show all the layers building up.


Back, soon,
Chris x

30 November 2019

PaperArtsy Blog - Topic 19 - Cute Critters


Hi everyone, I'm contributing on the PaperArtsy blog today where I'm sharing Party Cats card for the cute critters topic.


You couldn't get cuter or more fun than Elena's Zinski Art Christmas stamp set ZA50, the purrrrrrfect party animals! 


My background is a mix of Infusions, they are Olive Tree and Frankly Scarlet.


I did my paint splatter with Iceberg and Snowflake Fresco Finish Chalk Acrylics and I also used the Snowflake to stencil in the background through Sara's Christmas stencil 114 with a stencil brush.


Intial colouring is with Inktense watercolour pencils, I've used a dabbing action to achieve the mottled appearance of the fur. You can see the stenciled pine leaves here, they make a nice border around the card. 


I added a touch of coloured pencil over the watercolouring here and there but I didn't need much. These two Infusions colours are gorgeous in the background and perfect for Christmas colour schemes.

There are more close up photo's and steps on the PaperArtsy blog and lots of inspiration over the two weeks of this topic if you love stamping cute characters.

Have a lovely weekend!
Chris


22 November 2019

PaperArtsy Topic 18 - Shaving Foam - Festive Foam


Hi everyone, I have a post to share on the PaperArtsy Blog today which is all about Shaving Foam! Something I hadn't ever tried for crafting and I very much enjoyed it. I was lucky enough to have some of the new stamps by Tracey and also some of the new paint colours which are very pretty. I've gone bold and pastel with some Christmas cards now made to add to my stash! There are lots of gorgeous examples from other contributors too, a really lovely topic that everyone enjoyed! More photo's and steps I took on the PaperArtsy blog post.


Have a great weekend!

Chris x


30 October 2019

PaperArtsy - Topic 17 - A Vintage Christmas

2019 Topic 17: A Vintage Christmas


Hi everyone, on the PaperArtsy blog I'm sharing my take on topic 17 which is 'A Vintage Christmas'. I chose to work with gorgeous recently released Christmas stamps and stencils by Kay Carley. All the stockists for the stamps and stencils I used can be found on this post.  It's nice to do a pretty project like this now and again with lots of sparkle and a gorgeous palette of colours that I feel can reflect vintage from Tracey Scott's new Fresco Finish Chalk Acrylic Paint release. Stockists for the paints can be found at the end of this post.

I enjoy decorating gift bags and making tags for my Christmas gifts and everyone seems to appreciate them which is nice so I feel it's worth the effort. This one will be for my mum, it can be easily pegged onto the top edge of the bag.


There's a gel print in the background using some of the paints listed above. The Fresco's  create a really nice base for stencilling and also for colouring with pencils, the mono print gives an even coating of paint on the card with a little tooth for the pencils to grab. 
Die cut holly, a silver skeleton leaf, silver mini clothes peg, and a silver glitter matting layer all help to add the vintage sparkle.


The gift bag follows on from the tag above in style with a stencilled and stamped mono print and then stencilling over the top. The die cut this time is cut from another mono print where real leaves were used on the gel plate.


The recipients name could be written in the heart instead of using a gift tag.


By using different parts of a gel print you can achieve a nice variance in the colours but they all co-ordinate and the new Fresco colours are so pretty together. 


A bit of glitter card is another favourite thing of mine to use at Christmas and some wrinkled seam binding too.


Have a good week.

Chris x


28 August 2019

PaperArtsy Blog contribution - Topic 13 Mushrooms


Hi everyone, hope you're well. I have a project on the PaperArtsy Blog currently where we're sharing projects for topic 13 - Mushrooms. 


I made a one layer card.


I did some gel printing as the background layer using a PaperArtsy stencil.


The mushrooms were created using an entirely different stamp, there are more photo's and how I created them on the PA blog.


Back soon,
Chris x


10 July 2019

PaperArtsy - New Stamps Release - Seth Apter Mini's

July 2019 New Products
Eclectica³ Collection {Seth Apter}


Hi everyone, I'm sharing my projects with Seth Apter's new mini's #41-48 for the release tonight on the PaperArtsy Blog.  I very much admire Seth's art which is all about layering and his new mini's are perfect for making that easy and enjoyable as they all go together so well.

You can create depth and textural interest with the stamps by stamping in different colours and overlaying with black and further down the post you can see how I created my base layers with very quick and easy techniques. 


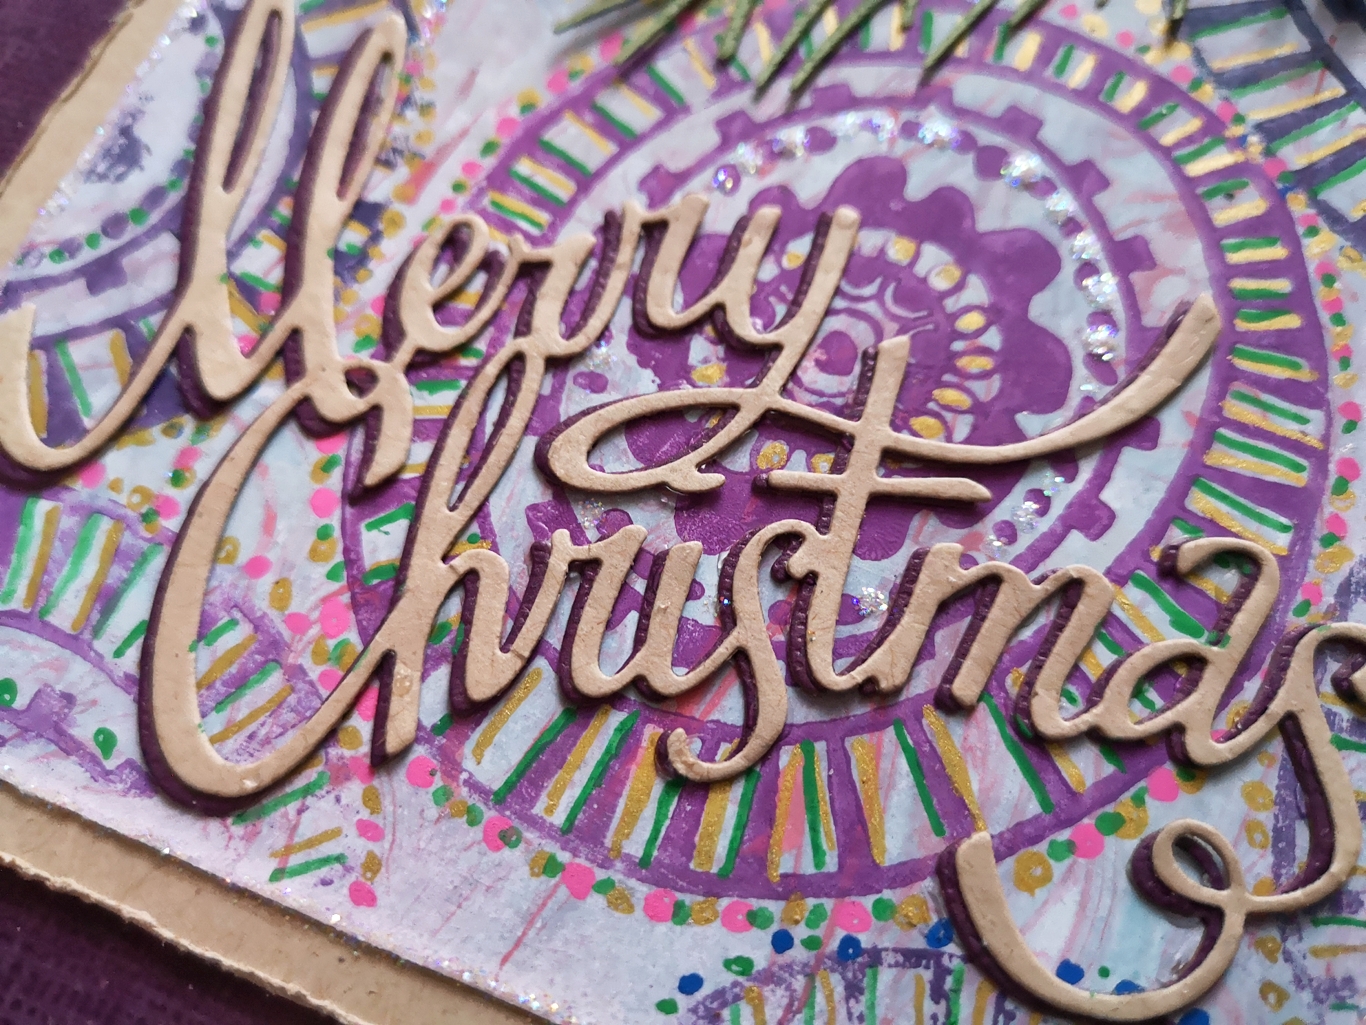
My first make is a large Birthday Tag. I stamped with all of the stamps over my base layer in various coloured inks and finally with black. 


Outlining some of the stamped images in white pen helps to bring them forward and add interest. Glossy dimensional glue has been added to the die cut letters and on the circles on the focal star from Seth's stamp set ESA 03 for extra shine.


I used a couple of Seth's embossing powders to create yet more texture on the die cut scalloped frame and on the wood star embellishments. 


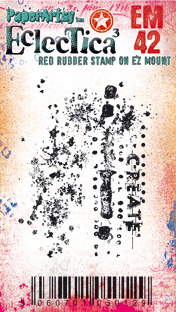
I cut a smaller tag from the same base layer outlined in white and also die cut some stars to add to the painted and glossed wood stars. I cut out the word 'create' from EM42 and used it for my sentiment.


I love the grunginess of some of the mini's in this collection. EM47 has those lovely grungy lines!


Similar to the tag above but slightly differently embellished and using the text 'your story' from MA46.


For this tag, I used the stamps with a gel plate print and the bolder design mini's work particularly well with the gel plate. The words are taken from MA46.


I love the texture you get with mono prints, I used thin brayered layers of Fresco Finish Chalk Acrylics for this tag.


A die cut mono print is decorated with the same technique of outlining and this time made into a card, I like the more feminine colour scheme from this part of the print, colours tend to get mixed on the gel plate so you can end up with quite a variety of colour schemes which is perfect for batches of tags or cards that all look a little different.


The die cut heart is covered in glossy dimensional glue which I used to highlight areas of most of the samples.


Another card from a mono print.


All the ribbons I added were dyed with Infusions; damp the seam binding ribbon, sprinkle with Infusions powders and dry off. 


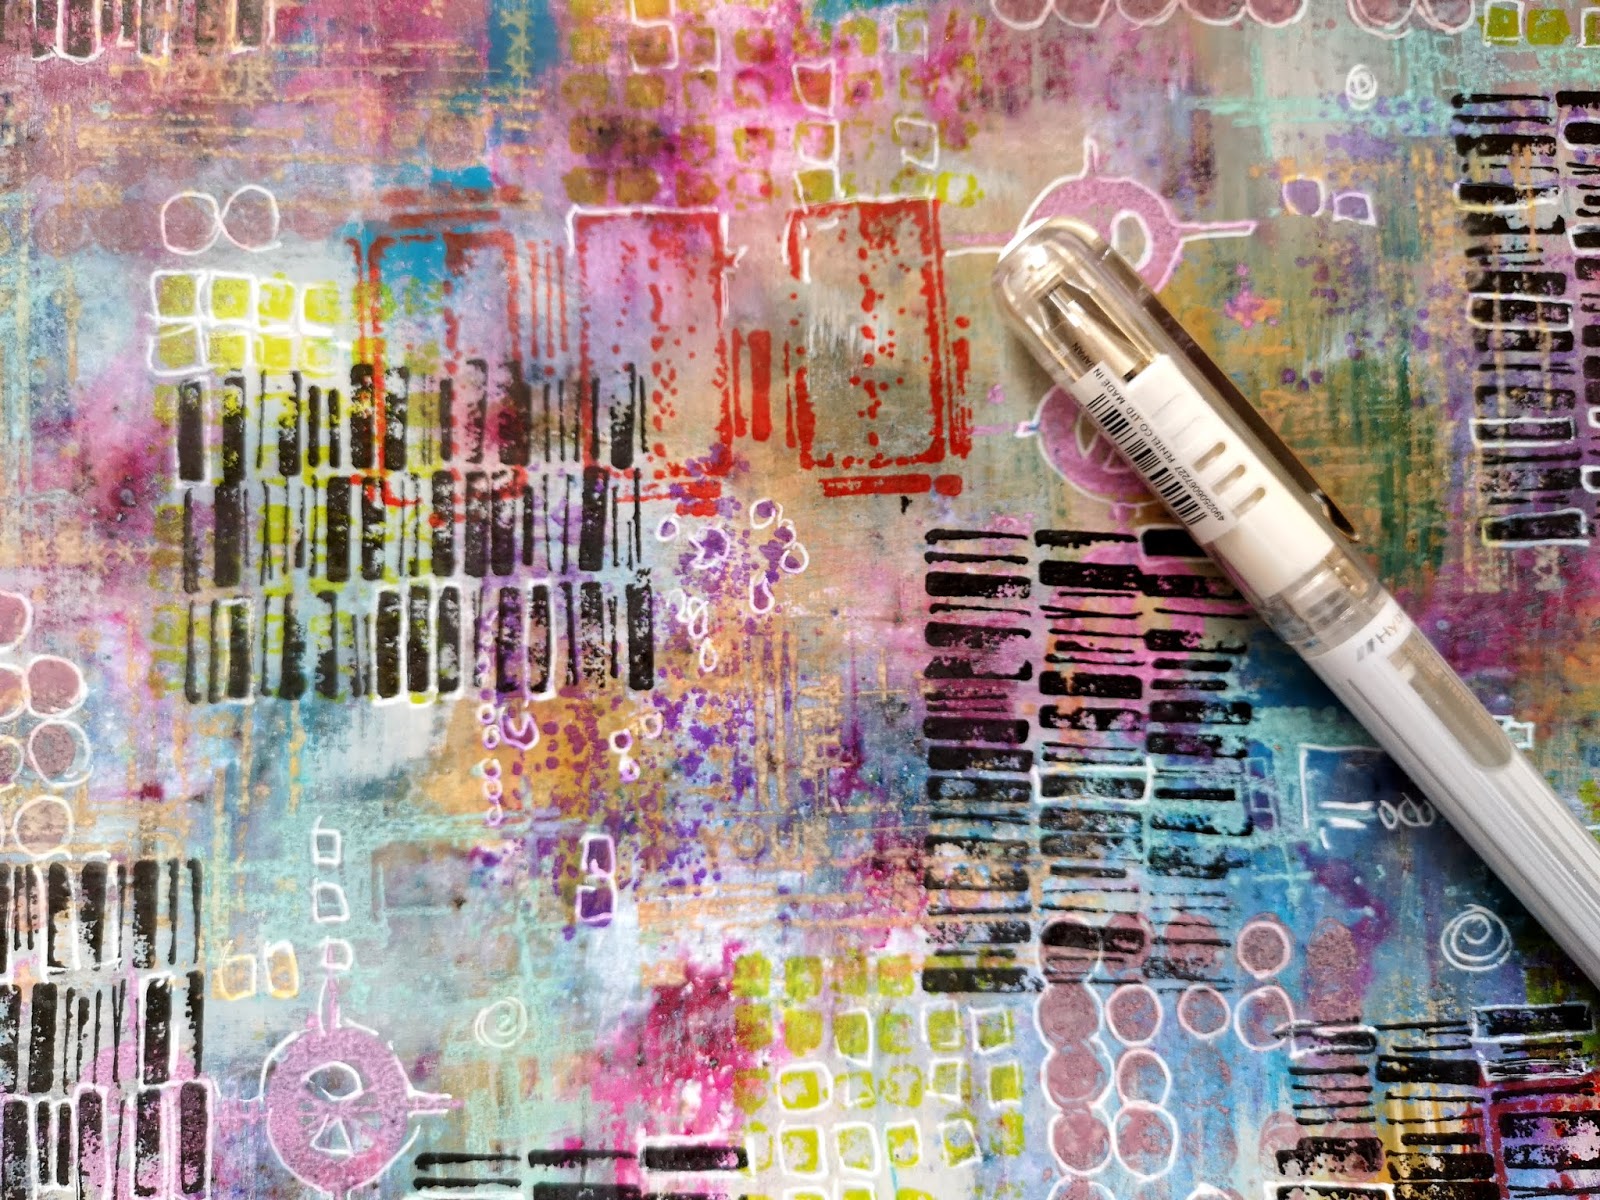
I started off with a master board base layer adding various complimentary colours of Fresco Finish Chalk Acrylics with a large brush, a few sprinklings of Infusions and finish with a lighter colour or two on top to bring it all together. This is a nice base for stamping all over with all of the stamps in various colours of ink.


The final touches are stamping in black and some outlining in with fine liner pens.


My second substrate is an easy splatter and squish method! Spatter watered down Fresco Finish Chalk Acrylic Paints Blue LagoonTerracotta and Claret on to two sheets of Heavy Weight Smoothy cardstock, smoosh them together paint sides facing, pull apart then allow to dry.


Repeat the process using Infusions in SlimeRoyal BloodVioletta and Olive Tree diluted in water. I stamped in black over these pieces and used for some of my layers and die cuts.


I usually keep a few paints in this little wood crate on my desk, it's patiently been waiting for some colour and pattern and the Mini's are lovely for creating random abstract patterns


I didn't mount the stamps on a block just dabbed on Fresco Finish Chalk Acrylics and randomly stamped around the box, overlapping and not thinking about it too much. I really enjoyed finally getting some colour on this crate and I have another slightly bigger one to do next, perhaps I'll use the orange and pick selection I already have in the box and add a selection of blue/green paints to that one.

Chris x